I am growing a few seedlings this year that I check several times a day for evidence weirdness. I'm definitely drawn to plants that are unusual and this year has been no exception. When I heard there was a really furry tomato that was also BLUE I had to have it. I later read the rest of the description and learned it was an F3, meaning that chances were good that there was going to be a whole lot of variety in the seeds. Ruh roh, that means I might not get the fuzzy blue I'm pining for!
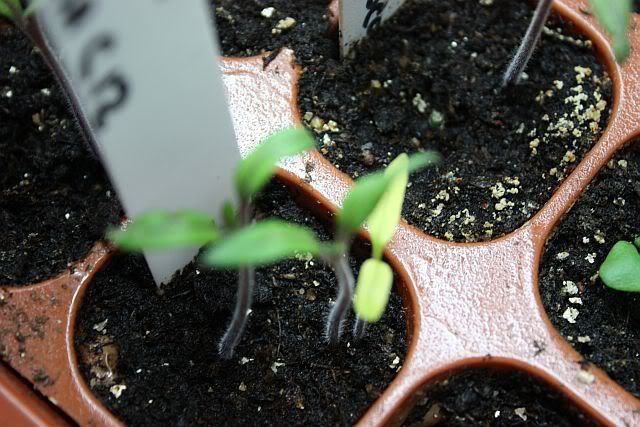
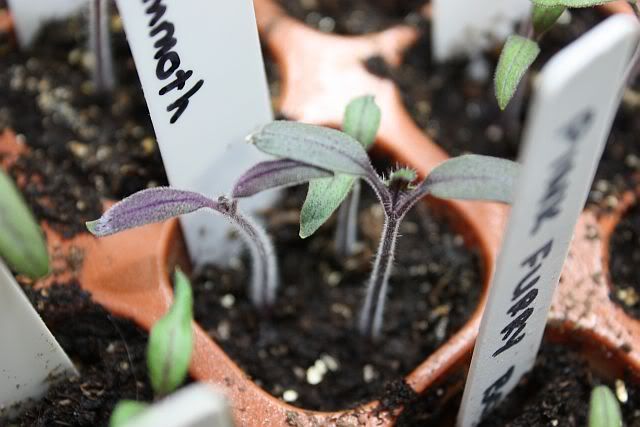
My angst over Seattle's Blue Woolly Mammoth has surrounded whether or not I was lucky to choose a few seeds from the pack that will give me the traits I want. So far so good. Despite my horrible camera skills I think it is clear that I have some blue (aka purple) going on with these guys. Since these are the only purple ones in the tray I'm hopeful their blue(purple) is from breeding and not from cold which can happen with tomatoes.
The other trait I am hoping for is big time fuzz! I'm talking seriously hairy weird looking plants. Again, the early signs are good. The plant on the left definitely has the fuzziest stem out of any plants in the tray. The seedling in the foreground looks like its first set of real leaves might have some big hairs going on. If I have to choose between blue and fur I choose blue but I really want both.
The other current freak getting a lot of poking these days is a single seedling of Maiden's Gold. Two of these seedlings are very green. One is not. Since I really love this color of green, I am hopeful this will be its mature color and that is lighter color is not a symptom of some sort of nutrient deficiency. That would be strange since it is sharing the exact same soil as the other greener seedlings but I have asked about it at Tomatoville. Tomatoville is where way smarter tomato than me hang out.
Finally the last freak in the tray is Fuzzy Pink Boar. This one is bugging me because it has such a cool name and the plant looks absolutely normal. I need to find out if the only fuzz on this plant is on the tomato, which might be disappointing except for the fact that the colors on the tomato are cool all by them self. I guess time will tell!
Thursday, March 1, 2012
Tuesday, February 28, 2012
The Hole-A Pond Story part Seven
Stacy Pulls A Pond and other acts of insanity.
This occurred Nov 10, 2011, sharing it now.
Today's weather: Cold 30 degrees, windy, rainy, yucky, blechy, blahToday's mission: Remove 2398472 wet leaves from pond and net it at last
Today's plan: Buy cabana boy pool skimmer thing. Put on rubber garden boots. Remove leaves. Net pond.
Work took me to New York this week. Got back last night. Unfortunately the pond netting didn't get delivered before I left and while I was gone we had another major wind storm and a whole lot of rain. Good news is pond is holding water! Bad news is that pond is holding leaves. Lots and lots of them. It is also thirty degrees out there right now, which means leaf removal is going to be chilly business!
The pond cover netting came while I was gone. Today's plan was to get the leaves out, get the netting up and fix the liner that started to fall in. Tick tock tick tock, not much time left. Had flakes flying last night! I need to make this quick because I am a popsicle and need to defrost with a shower. I spent $25 on the cabana boy pool skimmer thing and it was money wasted. It was was taking forever to get the leaves out and I was freezing. It was so flat, the leaves kept drifting off the top, my cute rubber boots were not tall enough, got a bit of water in them... you get the picture. Also, it was really really cold out.
I needed a new plan. My second plan was to try and mimic what I saw on a koi forum when they all capture the koi by dragging a giant net thru the water. I would use my shiny new 15x20 foot net and drag it thru the water and capture all the leaves at once. FAIL. Unfortunately I forgot that they do it with a dozen or so people holding the netting, in water that is a few degrees warmer than freezing. This didn't work solo. Though no doubt the neighbors probably enjoyed the production.
| Oh Yay snow. Fan-frickentastic. |
Right around this time it started snowing. Charming little flakes which would have been exciting if I wasn't so cold. At this point I exited the pond grabbed my cabana boy pool thing and tried to get the net to stop being so floaty. Didn't work. (Duh)
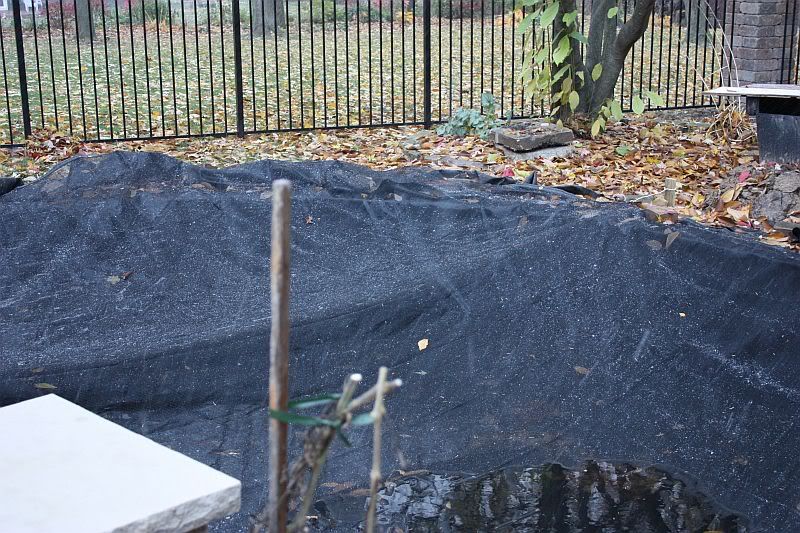
Then I had a mini-tantrum where I started whacking at it in frustration. This caused a brick that was on the edge of the pond to fall into the water, onto the net, weighting down the edge. Hey now, this could work! I started sort of stirring the water, guiding the leaves to the net and because one edge was down and the annoying floaty edge stayed up, I was able to create a current by pulling the water one way. This worked brilliantly, the leaves came up off the bottom, but got stuck in the net. I had most of them netted in about twenty minutes. I was pretty cool how great it actually worked. It had also stopped snowing. Things were looking up. I just had to get this massive net now filled with bazillions of wet heavy leaves out of the pond.
Got pretty well soaked doing that. Now actively shivering but almost done!
I started getting the net across the pond for final placement. This was harder than it should have been primarily because I should have bought a bigger net. If I pulled too hard on one side, the net edge fell in the water, and I had to get in the water AGAIN to fish it out. Eventually I figured out it was impossible for one person to get this done before hypothermia set in. (I was actively shivering at this point. Luckily the school bus arrived and I could recruit a munchkin to assist. Munchkins wanting stuff are easy to recruit. My munchkin was hoping for some new tunes
| Yes, those are some leaves still under the net. *Grumble* |
Unfortunately by this time it has started sleeting. Giant chunks of icy fun. Pretty darn sucky. <--{PC version of what I really mean}. I got about six stakes in and decided to call it quits for today. The final straw was after moving a bit of tarp I was almost killed by nuclear spider. He is clearly freakish and dangerous because spiders aren't supposed to be alive when it is snowing and he was very much alive, waving his hairy legs around like that. He could be a brown recluse, which you definitely don't want a bite from. Particularly if he is nuclear.
| Nuclear Spider |
If you don't hear from me for awhile it is either because I have pneumonia, my husband has had me committed for insanity, or nuclear spider got me.
February 28th, 2012
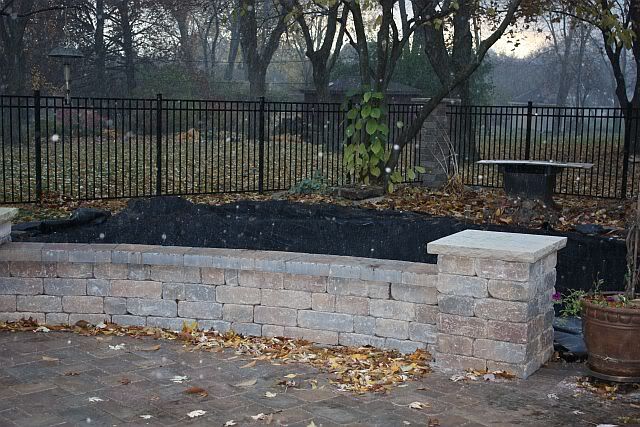
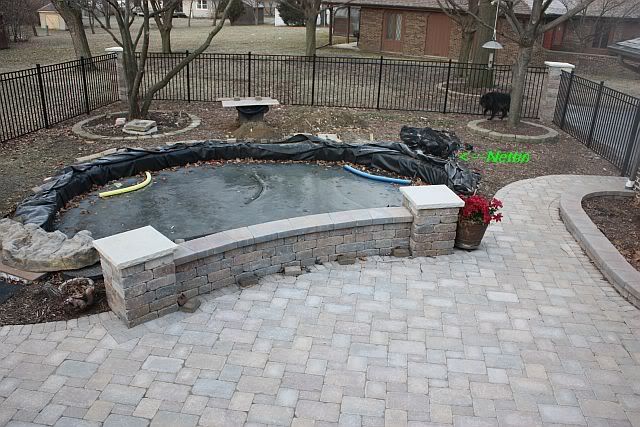
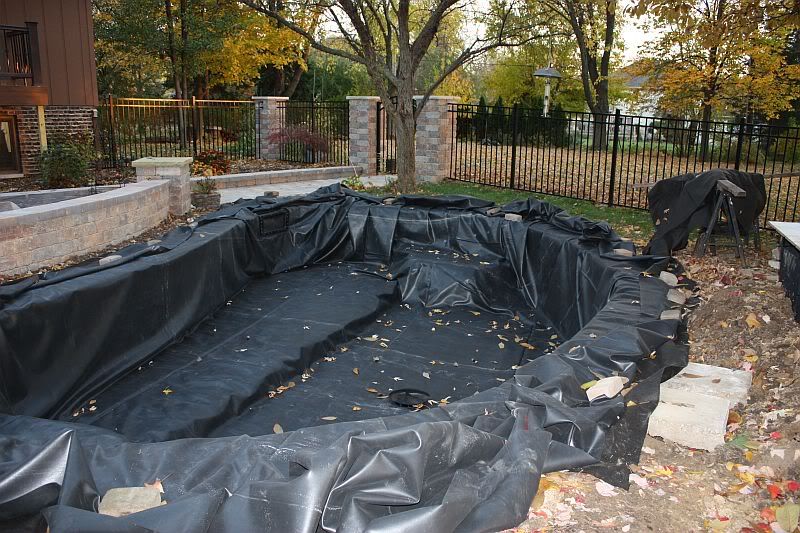
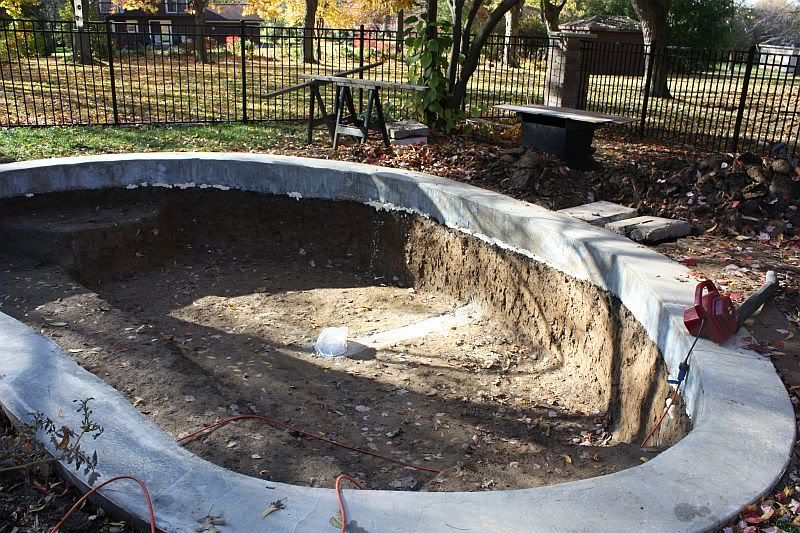
The above is where I left it last fall. At one point I had to remove the netting because we had a big snowstorm and I didn't want the snow to rip it. Now the ice is covered with lots of leaves that I need to clear off before the thaw. Hopefully today. This is what the unfinished pond has looked like all winter.
Sunday, February 26, 2012
The Hole: A Pond is Born-Part Six
Part Six of last fall's tale- Part one starts here.
November 6, Morning. It's a Beautiful Morning...I think I'll go outside for a time...
Today I've decided I'm actually quite brilliant deciding to dig a pond so late in the season. What an extraordinary morning, the light, the leaves, the chilly breeze. Just fantastic.
Yesterday I filled in the long trench for a chunk of the day. I put pea gravel that we had laying around under the pipe so now the whole set up doubles as a french drain. I also starting mucking with the waterfall/veggie pond area. I switched it around completely from my original plan. I've been reminded that veggies like sun, so now the veggie filter is in a sunnier area.
Today I was up early. I blew all the leaves out of the hole, trimmed out remaining roots and trimmed up my foam patching which was quite fun. Now its time for underlayment!! I'm hoping liner today as well. Still haven't figured out how we will get that done. I have a vague plan which includes my big husband, some hefty plant rollers and a kid with the 911 number handy. Wish me luck!
| Before work begins, I need to do something about these leaves! |
November 5-Evening
It's a Waterless Pond!!
We missed the ER, but just barely!
It started lovely. I had on tunes, I was in socks spreading out a fuzzy blanket over the hole. Breeze picked up and windchill got down to about 40 but it was warm in the pit! I learned that kiddos in socks are excellent at doing the Princess and the Pea thing. They found a handful of sharpies that I missed that I had to cut out. The geotextile liner was really nice to work with. It cut easily and the fibers in it made it sort of stick to itself and the edge of the collar. Despite the wind, I only needed a few bricks to keep it up.
First dramatic moment came from Bendy Boy(my son). He was screwing around and popped his knee out of its joint. Unfortunately he was at the bottom of the pond when he did it. Neither my husband and I were all that excited about hauling him out and to the ER so we tried to see if we could get it back in. Success! I'm sure it hurt like you know what we got past that crisis in about 15 minutes with minimal tears. Liner time!
The liner is 24x35. It is heavy. The plan with it was to load it onto my plant rollers. They hold 500# each so I figured 370 pounds of liner should be a peace of cake. I worked great! We were easily able to load it. I wheeled it myself to the pond edge then we edged it to the bottom without too much trouble. Once it was on the bottom, we unrolled it from there and then unfolded the sides. The bottom came out with almost no wrinkles from the get go, as a result. The sides? Wrinkles, but that is to be expected from the pond shape. I'm not all that worried about them since rock on a roll is going to cover them. I'll fuss with them a little more tomorrow.
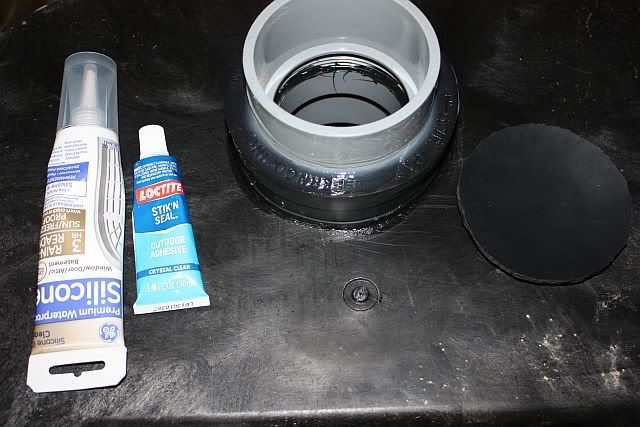
Bottom drain was next. This too was minimal drama, other than putting WAY more marine grade silicone than necessary, it went smoothly. Very scarey making that cut though! I was expecting the slicing to be much harder. As a result I used more force than necessary and I almost cut to far. Didn't though!
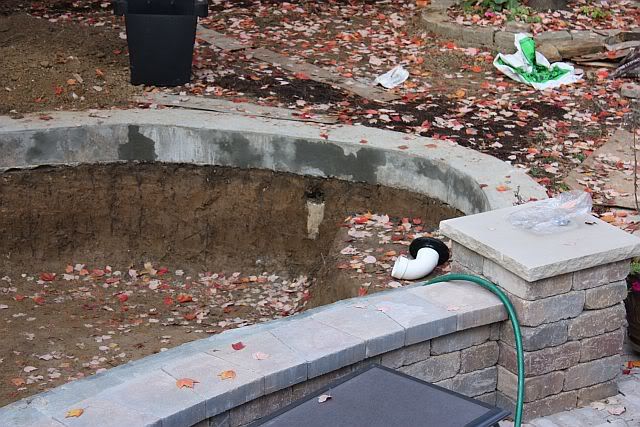
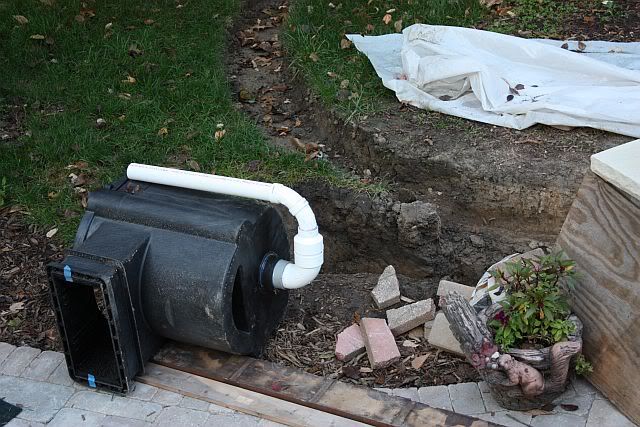
Last thing I did today was the skimmer face. Thank goodness I watched the video on this one first. I almost forgot to put the weir door in!. I had about five minutes of panic when I punctured the first hole and then couldn't get the first bolt in. Once that one was in though, they all went smooth. I left some slack liner under it, in case things settle or I want to raise the skimmer at a later date. So it looks a little poofy in the picture.
I was just getting the last bolt in when I heard CRASH! *&&*%^ *&%&^% *&^*&^. My husband cracked his head open working under the deck. It was a bloody affair for a few minutes but stiches were averted. He is watching hockey with a giant ice pack on his head. Me, I'm ready to warm up with a bubble bath. My ears are icy but I am so glad to be at this point. Next stage is filling, but that is not happening on purpose until the netting I ordered comes. I really reallyt really really really need it to come soon. There are already a lot of leaves in there just from the past couple of hours the weather is turning fast and I don't want to be fishing billions of leaves out of water once the first rain comes.
| "Someone really needs to get at those leaves" |
Friday, February 24, 2012
The Hole: A Pond Saga, er I mean Story: Part Five
Way too late last fall, I started to start building a pond. It ended up way bigger than originally planned. Here is part five of the saga. Part one starts here.
November 2nd, 2011
Near Tragedy Averted
| 6" of dense yellow clay packed down and primed to kill the trees |
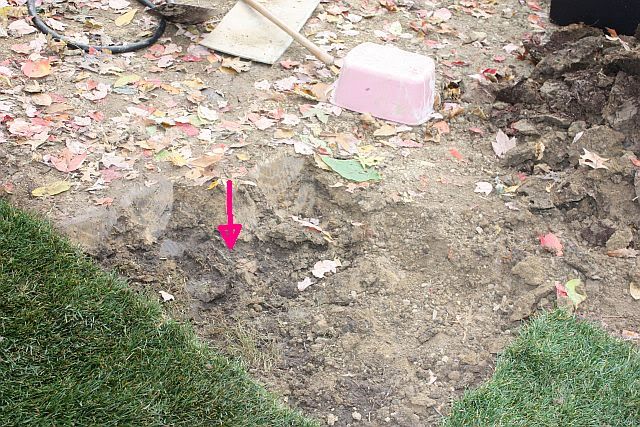
I was feeling pretty good about the hole being dug, and was ready to move on to liner then I had to stop again. When I hired the guys to dig out the rest of the pond, I didn't watch them every second. When I first looked at the site when they were done, all looked great. Unfortunately today I found this.
The not so sharp picture is of 6-8 inches of dense yellow clay. It turns all of the clay didn't get hauled away. A whole lot of it got spread around and rolled over and flattened. This is a big problem on several fronts. First the clay is going to kill the maple and the magnolia that is surrounds. It is going to suffocate them. Second, the new grading is going to not work so great with keeping water away from the house. I have to spend today and tomorrow digging this all out, finding a place for it and then laying down some new sod that you see in the picture to prevent the whole area from becoming a giant mud pit. Two steps forward one step in goo...
At least I got the bottom drain done. This needed to be set in concrete to prevent it from moving. A moving bottom drain can tear your liner. I am very proud of how this came out. It was nerve racking because you had to get the concrete in while keeping the pipe at the perfect height and making sure it all was level. Then the concrete had to be shaped in such a way so that there were not rough spots sticking up AND no depressions. Believe it or not this thin little groove took 480 pounds of concrete to fill! OK a bit of that went into the tunnel under the collar but still! Getting 80 pound bags down into a 3.5 foot slippery hole without killing yourself is quite a workout. I mixed it all in the little pink tub thing again because 1) I still didn't want to get my new wheel barrow dirty and 2) I didn't feel like trying to wrestle it down into the hole.
| Check out the foam under the edge, scraping that flush was fun! |
| My pond is going to be a pit of leaves by tomorrow at this rate. |
I learned a very important lesson about concrete today that I knew but had completely forgotten. It BURNS. Yeah fresh concrete can burn your skin. I wore gloves when I mixed it, but they were porous and some leaked through. I felt my hand stinging and thought at first it was just irritation from friction or something. Nope. In one place it blistered. I don't even mind because this scary part of the journey is DONE!
Thursday, February 23, 2012
The Hole: A Pond Story Part 4
This is part four in the pond building story from late last fall, part 1 starts here
It's dug- From October 29, 2012 -MORNING
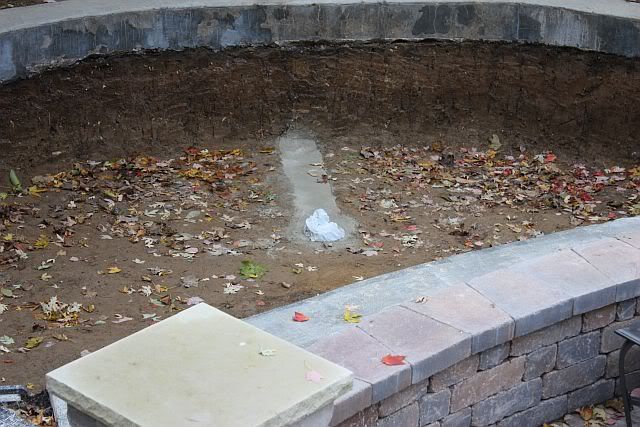
| Hole is dug and collar is patched. Now for the bottom drain. |
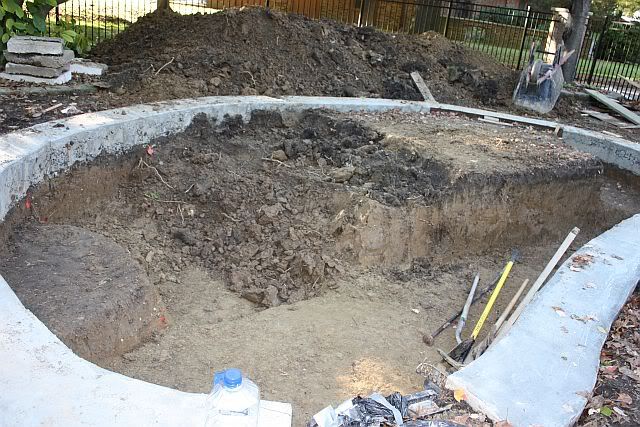
We have hole. It is 3.5 deep at the deepest section. 2.5 deep in the shallows. Getting it to this point created quite a mess and we ended up having to make multiple trips with a huge dump truck to get rid the clay. Here is where I'm starting from this morning. Getting the little BD tunnel under the collar dug was a giganormous PIA. It was 100% of the evil rock clay garbage that oddly had gravel in it here as well, making it way worse. It involved laying on the ground and chipping at it bit by tiny bit. I am almost positive that there must have been a simpler way to do this but it is beyond me what it was. Oh well that part is done-hopefully.
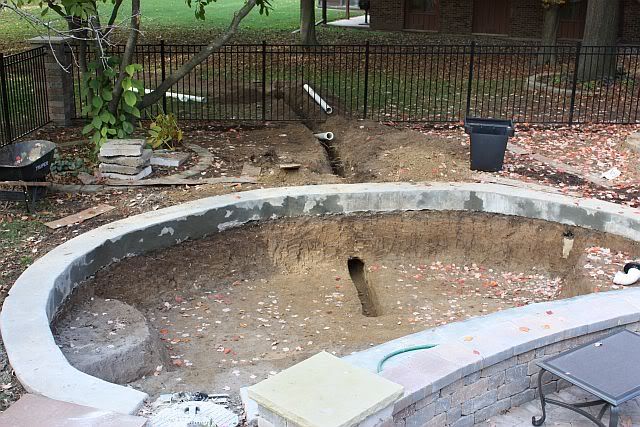
We rented a trench machine thing to dig out the trench for the drain to the ditch. It sort of is like a bulldozer with a giant chain saw on the front of it. Scary stuff. Today's trick will be getting the bottom drain pipe right at the bottom of a 4' trench that is six inches wide. Off to work!
October 29, 2012 Night
Drat It's Stuck
Stacy's Should have been obvious tip of the day: If you are going to use ginormous machines to make deep and very narrow trenches, make sure they are absolutely perfectly perfect straight, because there is no play for mistakes in a six inch hole when the pipe is 4" wide and ten feet long and digging tiny deep trenches wider sucks. Sigh
After all day in the cold I'm about 2/3 done with the bottom drain plumbing. Which as a reminder is about 50 feet long. Heh. It turned out to be waaaaay harder than I thought because there was no room to maneuver in my slender trench, I kept getting loose dirt from the trench sides in the trench and good grief ten feet of that fat stuff is heavy and unwieldy. Also my tiny tunnel under the collar did not lend itself to threading the needle with a big fat pipe with a 45 on the end. <--Oops # 234
Trying to get it all right was exhausting. Since it is drained by gravity is is really important that the pitch of it is correct. Water left standing in the pipe will be bad. However lifting those huge sections of pipe in and out of that narrow trench made it really tempting to just start taking short cuts. I didn't but was tempted. I was crying at one point, and threw a shovel across the yard at another. :)
After much fussing and whining, and threatening Spazzy McDrool with the pound if he kicked more dirt in my trench, I think I finally have it all pitched right. Tomorrow I hope to finish final connections, backfill it all, concrete the drain in, get the mud pile covered with a thick topping of mulch so the dog stops dragging it all into the house and them maybe Monday underlayment and liner?<<--{This is so not close to what really will likely get done but it's fun to dream.} Tomorrow morning is shot due to the squirt's hockey game. Fingers crossed afternoon weather is good.
| Got leaves? |
Stacy
Tuesday, February 21, 2012
The Hole: A Pond Story -Part 3
The continuing tale of the project I started way too late last summer. Part one starts here.
October 24th, 2011
That's a Big Hole!.
The project persists despite the caw caw caw of the stupid bird that is driving me to madness with his non-stop caw caw cawing the second I go out to work. If I had a slingshot....
| Leaves coming down hard. Time is running out! |
I have been working on this thing every single day. The plumbing for the pump pit is now about half done. I did it all myself if you don't count the dozen threads I started elsewhere asking questions about the minutiae of PVC. I've learned that gluing the PVC is the easy part, getting it all the right height, not so much. In pond building, apparently if you go down with the pipe and then go up YOU MUST NOT GO BACK DOWN AGAIN OR ELSE!!! This repeated mantra on the ponding forums had me so paranoid I went out and got a super long level, which worked great until I left it on the driveway and ran over with my car later that day.
The concrete collar seemingly went in without a hitch. Unfortunately now that the forms are removed, turns out the hitch was absent but the holes were not. Holes, lots of them. They say they are going to fix them by grinding down the rough edges and filling the holes. I am predicting a lot of mess in that process.
| The rough spots in the collar are very apparent at the back of the picture. |
So anyway, I started digging the hole and OMG it was hard. The first six inches or so was easy. I gleefully dug predicting completion by the end of the day. I was fantasizing about writing a post on the pond forums telling them all what big whiners they were. Then I hit IT. The initial foot of clay wasn't so bad. Really heavy but you could get a shovel into it. Still I had to sort of get up close to the shovel head with both hands to try and lift it up. It was really heavy and it got worse fast. After the clay layer became pretty much like rock. The only way to get it broken was with a pick axe. I gave it everything I had but between the rock hard clay and the increasing difficulty of lifting it higher and higher to get it out of the hole it quickly apparent that I would be digging my grave if I tried to do the whole thing myself. Never mind the whole issue with trying to find places to stash the dirt. I like my spine intact so I pursued hiring out the rest of the dig.
That involved a lot of waiting. Waiting and waiting. But today they finally came! My site was nice and neat before they arrived. Now, not so much. Oh well, pace has picked up so that's good because I need to get the pace picked up! The leaves are starting to fall hard now.
The area is now a completely horrible place for the dog. He love climbing the dirt mound and he loves hanging in the hole. I knew he had some varmit genes in him. Purebred my heiny.
| Oh look! Post in the wall not so cleverly hidden after all! |
Will the workers come back soon? Will the dog fall in the pit? Will the pile collapse? Will my spouse kill me for creating this disaster zone weeks before the snow flies and the holiday season starts? Stay tuned!
Monday, February 20, 2012
The Hole: A Pond Story part 2B
"The Hole" project began late last summer. I didn't blog about it and am catching up now. Here is part 2B. Part 1 starts here.
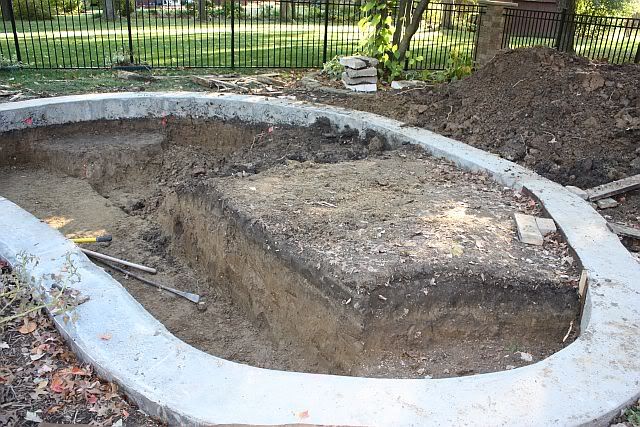
Prior to excavating a pond that is deeper than a foot or so, it is prudent to put some assurances in place if you are going very deep. Assurances that the walls won't collapse. When I first started this journey, I thought that the water pressure on the walls was enough to prevent that from happening. Not so I learned after reading about disastrous collapse after collapse on various pond forums. This is why I decided to put in a concrete collar. The collar serves a couple of purposes. It helps with the whole collapse issue, it gives a level surface for putting boulders or edging on and it helps make sure your water level is level (if done right.) And it provides a fun catwalk for your daughter and pooch to prance on.
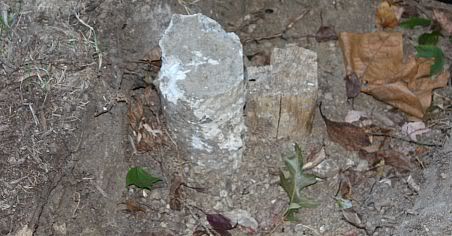
Now that I had dug out the collar, the next step was to remove the concrete posts that were in the collar. Brilliant me had dug a drench that landed smack center on two old fenceposts. If I had wanted to do this, never in a million years would it have happened. So how do you remove a 4 foot deep concrete post that circles a wood post? You don't...mostly. Oh I whacked at it for a good few hours. The chips flew, (and cut my forehead). I took an ax to the wood part and whittled it away bit by bit. I played some tunes and whacked whacked whacked away at it. Eventually I got it down to just below the level of the soil by about 1/2". This is when I covered the rest with a little clay and pretended like I have never seen it before. I have no idea if covering the rest of it was bad. I refuse to think about it.
The next step was to dig out the trench again because by this day, the dog had destroyed enough of it that I had to dig part out all over again. Oh and go deeper. My spousal unit helpfully pointed out where our frost line really was and said since I was doing it, I should definitely go deeper {insert dark mutterings} . Here are a few of my notes about the whole concrete collar business:
Today's excuses for not more dirt moved.
1. Mom taxi services required x 2.
2. &^$&^$^& maple roots.
3. &^*&% yellow clay.
4. Not recognizing the miracle of the pick ax until hour six.
5. Shape not set in stone. <---this was the main one since I kept changing it.
Lessons learned today.
1. The Pick axe rocks at yellow clay removal.
2. I STINK at guesstimating distances. My planned 15x11 pond is now 20x12.
3. Spazzy McDrool LOVES playing jump the trench. He is also horrible at it, which means sides getting messed up when he misses.
4. Spaazy McDrool would much rather play jump the trench then cross the bridge I stopped to make for him to get him to stop playing jump the trench.
1. Mom taxi services required x 2.
2. &^$&^$^& maple roots.
3. &^*&% yellow clay.
4. Not recognizing the miracle of the pick ax until hour six.
5. Shape not set in stone. <---this was the main one since I kept changing it.
Lessons learned today.
1. The Pick axe rocks at yellow clay removal.
2. I STINK at guesstimating distances. My planned 15x11 pond is now 20x12.
3. Spazzy McDrool LOVES playing jump the trench. He is also horrible at it, which means sides getting messed up when he misses.
4. Spaazy McDrool would much rather play jump the trench then cross the bridge I stopped to make for him to get him to stop playing jump the trench.
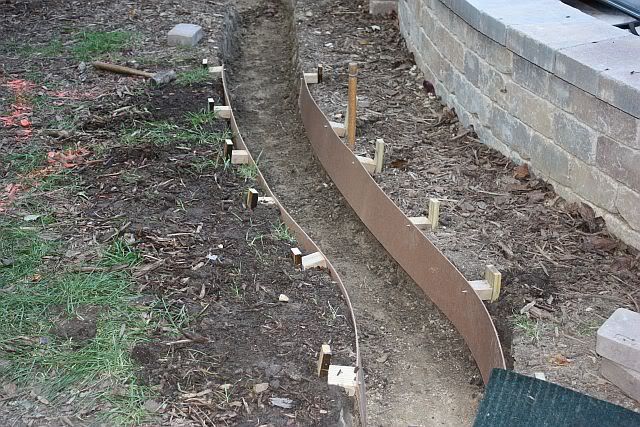
Then came the mysterious bender board. No one in Illinois sells it that I was able to discover. After finally discovering that bender board is Masonite and finding a box store guy that knew what Masonite was, I was off to begin form building. Here are the first two board forms which took pretty much a whole day to get done. Once completed I proudly posted a picture on a koi forum and was told within a couple of minutes that I did it wrong. WAH!
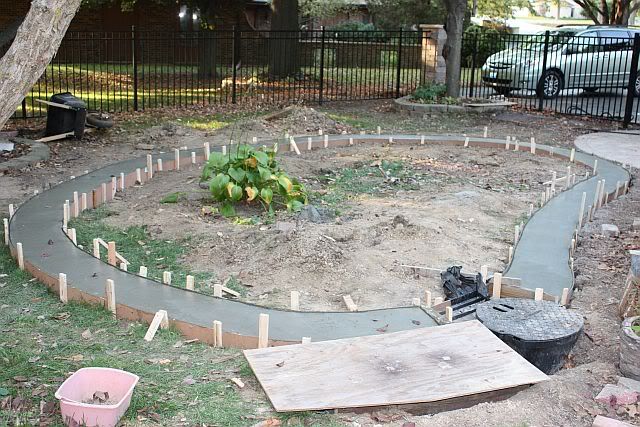
I really really wanted to do this myself but you have to know your limitations and I eventually figured out that I...am...way...too...slow to have success with concrete. So I paid someone a decent chunk of change to do it for me. It seemed like it went OK on the initial inspection. We excitedly carved our names in it and carefully covered it with plastic to get it to cure properly. It looks so nice and smooth right?
Sigh. They didn't do a good job tamping it down or setting the interior forms. There were gaps, and holes and boy or boy was the spousal unit PO'd! My main concern was all the sharp edges. They don't mix very well with rubber liners. Oh and I forgot to have them put in the overflow pipe-drat. At this point we were getting well into fall and I started toying with the idea of bagging the rest of this project until spring. I didn't but I can't remember what my logic was for it.
I think it was that I wanted them to fix the problems before winter so I didn't have to worry about it for months.
Part 3 continues here.
Saturday, February 18, 2012
The Hole: A Pond Story Part Two
| The skimmer hole is at the far end of the seat wall |
Late last summer I decided I needed a pond. Here is part two of the installation saga. These stories were originally posted in a private forum. Part one is here.
Friday, February 17, 2012
The Hole: A Pond Story-Part One
I need to get the blog caught up with all the events of last fall. The Hole excerpts were originally shared with a group of friends in a private forum. Why private? When at the mercy of contractors, you don't want to be posting stuff like this publicly! Edited to remove an obscenity or two or six.
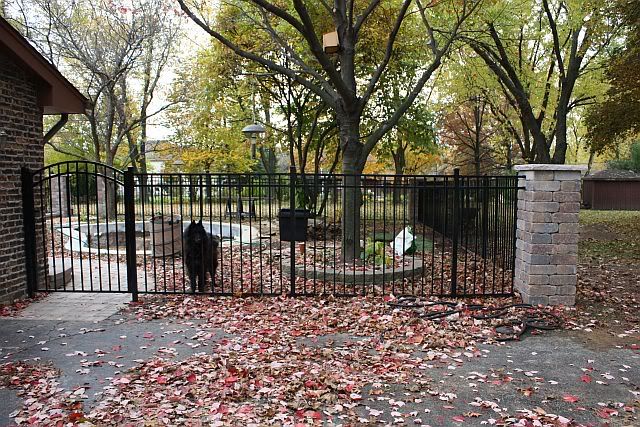
First a before picture! This is the whole area before we ripped out the rotten fence and expanded it out and put in the new patio. It was...bad. I especially miss the chairs along the fence to try and stop the Belgium from running a trench. The pond was to be the final step of this fix.
Originally shared Sept 12, 2011 in private with friends that resisted the urge to commit me. Kujos to them!
Once upon a time a demented woman decided a pond would be cool. After doing much research, she decided she was ready to go. Not wanting to move a semi full of dirt herself, she began to research pond workers. She soon discovered that Chicago's 12% unemployment rate is not compromised of a single pond worker. Pond workers don't want jobs unless they cost 30K+.
The woman was not so demented that she was going to spend 30K, 20K, 10K or even 5K on a hole in the ground lined with plastic where she is doing all the plumbing, hiring her own electrical and doing all the waterfall and landscaping. Ah ha, she said, I'll do it myself! Yeah, still kind of demented. <--and rather stupido to boot!
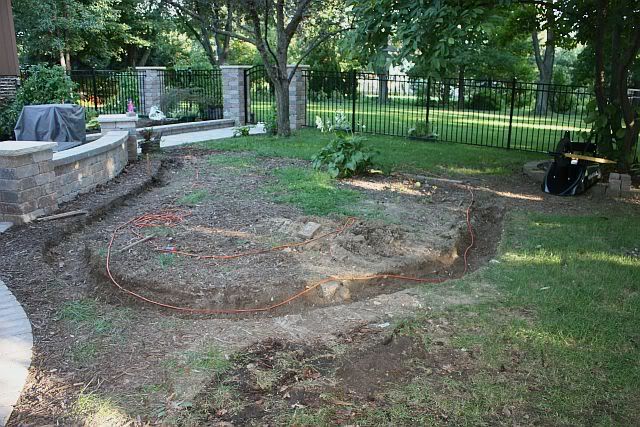
Step one: Dig a trench for a concrete collar. Crazy accomplished this after approximately 18 hours of digging. Of course it isn't quite done. Crazy's dog keeps trench hopping and missing and damaging trench sides, and then there is the concrete fence posts to contend with. Crazy discovered not one but two solid concrete buried old fence posts that fell smack center in the collar that now have to be removed. That should take a few days.
Step Two: Line trench with bender board forms and put in 3/8" rebar. After two days and a lot of driving, looking for bender board, I decided to table this and go to step three.
Step three: Find someone to dump concrete in the trench. FAIL. No one wants the job for less than 2K. "Lady it costs me 2K just to drive off the lot." Crazy decides she is not paying fricken 2K to have someone hold a concrete hose for an hour. Crazy decides to do this herself. This means lifting either 92.7 80 pound bags into a concrete mixer, mixing it with water and then loading it in a wheelbarrow to dump in a trench OR doing the same with 183 40 pound bags. Crazy decided mental preparation was needed for this step. So she proceeded to step four.
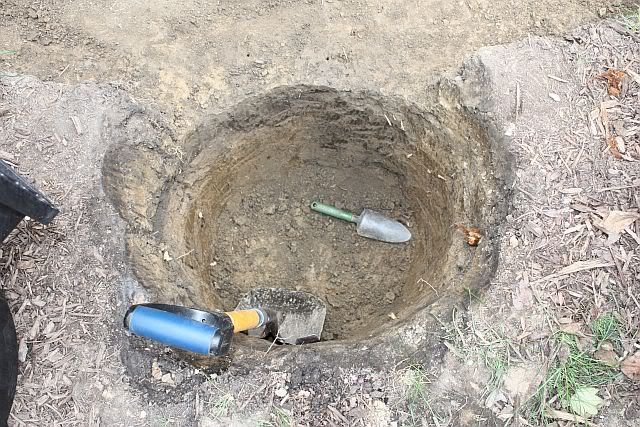
Step 4: Dig hole for skimmer. How hard could it be, it is a hole that is only about 32 inches wide and 30 inches deep. It took crazy nine hours to get close. Hauling dirt out of the bottom of a hole like that rather sucks when your back hurts and your arms seem to have shrunk. The realization that you have to go even deeper to accommodate the plumbing that some (content removed) sadist decided went on the bottom? Well that makes one skoot right on over to step five.
Step five: Shop for pond (content removed) stuff. How hard can it be? Online clicking and then check delivery. The click click went fine. Accomplished after much research and gotten for a song. The delivery however... Turns out the postal service is freaked to deliver to crazy people's houses. This was determined after observing the condition of the skimmer box, which seems to have been dropped from a low flying plane on to the porch. All sides were ripped and/or crushed and the bottom was completely open. This would not have been major, since skimmers are hardy. Unfortunately all small pond components got packed in the skimmer box. The result? Step five was completed after the photographing of the sixteen different components of the box from multiple angles to show damage and document missing items, then shrinking said photos and emailing.
End chapter one.
Stay tune for chapter two when I might actually get to dig again. Unless I am in jail for murdering the patio guys that showed up today unannounced to fix a low spot in the new patio and proceeded to rip out the wrong blocks.
Thursday, February 16, 2012
2012 Tomato Selections and Why
I'm back! This past summer and fall was a whole lot of digging misery(pond) and not a whole lot of harvest (garden neglect and horrible growing season). Neither make for very interesting blogging. Who wants to listen to someone gripe everyday right? In my head the 2012 growing season starts with the first seed starts so off we go.
2012 Tomato Selections and Why
I'll be trying for 24 varieties this year. Originally it was going to be16 but I acquired a few seed gifts yada yada yada going to need to find some space. I grow open pollinated varieties not hybrids. My reasons are that I can then save seeds that grow true to type and OP varieties almost always have better flavors. Many tomatoes I grow are heirlooms, meaning they have been around for a long time. Some are new and fantastic. This is who made the cut.
Marizol Bratka: Purchased from Heritage Seeds. Selected because it is purported to have all the flavor of the Brandywines with much better fruit set and productivity. It produces up to 1# dark pink tomatoes.
Pineapple: Grew it last year. Big and very pretty bi-color with very sweet fruit.
Katja: Seed purchased last year from Adaptive seeds but didn't have successful sprout. I'm hoping for a very early slicer that is purported to be delicious and "Does very well even in cool, shady gardens." Now that would be something!
Chocolate Stripes: I grow it every year, my sweet garden beauty. It's thicker skin means no icky cracks. Taste is very good and it gives great photo.
African Queen: Purchased from Heritage seeds this year. I was looking for a heavily producing, phenomenal tasting mid-late season slicer. This one sounded good.
Matina: Grew it in 2009 and got very early decent tasting smallish fruit. Seeing if the seed is still good so I can save some.
Persimmon: Another repeater. This one can be a pain to get going but man once it starts it goes nuts. Lots of 4 oz bright orange fruits. Not too sweet, just right.
Black Cherry: This is my third and last attempt at this one. Year one I got the wrong seed from Bakers Creek. Fail. Last year it hated the weather( most did) and the fruit didn't taste so great, the few that I recovered that didn't have blossom end rot. Everyone swears by this purple cherry. Hopefully the third time this the charm.
Hays : This was a gift from Dr. Carolyn Male as part of her annual seed give away. I asked her to surprise me. Hays originates from Bulgaria and got to the US by way of Hays, Alberta. It is a pink heart. Mmm hearts.
Anna Russian: Hearts usually have the somewhat disturbing wispy foliage. Anna Russian is no different in that respect. Where it differs is an earlier harvest. These are delicious. I grew them last year.
Striped Roman: I grow this stunner every year. It is a very meaty red with gold metallic stripes. Seems to be more resistant to wet season diseases than some of the others.
Crnkovic Yugoslavian: Tasty reliable productive pink that I grow most years.
German Red Strawberry: Several traits that bug. Wispy leaves, long growth time. However once you bite into these BIG red hearts, all that is forgotten. Great tomato.
Ludmilla Red Plum: Gift from Dr. Male. Productive German heirloom with plum shaped, decent sized fruit with very good flavor. Named by Reinhard Kraft of Germany, who named it after Ludmilla, a Kazakhstan German, who he received the seeds from. This is one of the few I am growing this year with a late season.
Terhune: Another gift from Dr. Male. Originates from the garden of an elderly woman in Minnesota who grew it for years. Said to be a big sturdy pink with Brandywine like flavor without Bradywine's issues.
Seattles Woolly Blue Mammoth: This is an F3 from Tom Wagners efforts. I failed at getting it off the ground last year. I bought it because the fruit are blue (aka purple) and the plant is fuzzy and I wanted a fuzzy blue tomato.
Sherry's Sweet Heart: Purchased from Wild Boar Farms. It is a new variety this year. I was drawn to the fact it is a midseason heart and the flavor is described as Mid-season and the flavor description was "Very good flavor, well balanced, sweet-acid."
Solar Flare: Wild Boar Farm's description on this was, "6-10 oz. Beefsteak, Red with Gold Stripes, Very Meaty with Luscious Sweet Red Tomato Flavor. F-7 Cross from Beauty King, selected for flavor, “WOW” Factor, production, increased earliness, scab resistance. Mid / Early Season, full body red, slightly sweet. This variety is one of my work horses." How could I resist?
Gary O'Sena: People always talk about this one. I've never bought it because I don't like it's name.Finally did this year from Heritage Farms. They say it is one of their earliest, best tasting, and prolific purple/black tomatoes. I hope they are right. An early black would be a good thing.
Maiden's Gold: Another gift from Dr. Male. The pictures of it are not all that attractive but I like its history and the fact that it might be another big fruited, old fashioned tasting, midseason variety. This tomato was raised in family gardens for years in Southwestern Virginia and dates back to at least the early 1950's. It almost went extinct in 2009, but 22 year old seed revived and saved.
Amazon Chocolate Gift from Hertitage seed. Not clear if this variety is yet stable. It is described as a very delicious brown slicer.
Pink Furry Boar Seriously, if you saw a tomato called pink furry boar wouldn't you buy it out of curiosity alone? I did. Plus it is pretty. And fuzzy. And pretty.
Porkchop: Also from Hertiage seeds, bred by Wild Boar farms. I needed a yellow. A striped yellow sounded even better. Said to be of excellent flavor.
That's it! I plant one cell of each variety, 2 seeds per cell on 2/11. Soil was Hoffman's Seed Started which was light and fluffy and completely free of that "beneficial fungus additive" that I will never start seed with again. Ever. No sprouts yet but I check 1 or four times a day as they sit on their heating pad. Feeling good about this season!
Subscribe to:
Posts (Atom)